STEAM at Home: Using “Everyday” Tools and Materials
Over the past two weeks, students, educators, and families across and beyond the U.S. have had to settle into new routines amidst school closures and social distancing imperatives.
We know the shift to remote learning and homeschooling can be challenging, especially when you may not have access to the same resources.
But, at Teknikio, we believe that the “classroom” is everywhere, including in your own home! That’s why our Learn from Home initiative includes discounted products and free resources to help learners innovate. Teknikio’s components are always designed to work with everyday materials. You probably aren’t going to the craft store, and ordering supplies online might not be necessary after you aggregate all the materials that are already in your house.
Materials for the well-prepared maker include: paper, cardboard, fabric scraps, plastic bottles, foam, food packaging, rubber bands, and plastic utensils.
You should also put together a list of crafting tools like scissors, glue, tape, markers, and crayons.
Encourage your students to take advantage of unstructured learning time to explore and innovate with things they can find around the house. In addition to bringing STEM concepts to life, hands-on learning will help keep them creative and engaged while combating feelings of boredom and isolation.
Here are two ideas to make the most of at-home materials for STEAM education. To buy any of the supplemental electronics components or project kits used in these examples, visit our web shop. We hope you and your kids will use them as inspiration for your own inventions! Share what you’ve made and connect with the community on Instagram or Twitter using #myteknikio and #steamathome.
Wearable Creations: Custom Light-Up Wallet
It’s a great time to reinvent your look! Felt, beads, string, fabric scraps, and old garments can be a treasure trove for any maker, bringing together design, mechanics, and tech skills.
Have some spare fabric and sewing supplies lying around? Design and create a custom wallet!
Getting Started
Before your learner does any “making,” consider guiding your learner through the following:
- What forms can a wallet or coin purse take? What functions or features do you want it to have? How hard or easy will it be? What colors and materials do you want to use (depending on what’s available)?
- Before designers cut any fabric, they make patterns to represent the shapes and sizes they’ll need. Using paper, a pencil, and a ruler (if you have one), draw a pattern to represent the fabric you’ll need!
- Do you feel safe using a needle and thread? What are some techniques for sewing safely?
- Do you want to include light-up components? If so, go back to your pattern and map out your circuits! Where will you need a power source? How will you connect the components so that your circuit works? What “trigger” do you want to use to turn the light on?
Making your Wallet
We’ve chosen to make a simple light-up wallet using a piece of leftover denim. We’re also attaching a small LED to the outside that lights up when you close the snap! The whole circuit is powered by a coin cell battery and connected using conductive thread. Want the full set of instructions? See this project on our website!
This project is compatible with the supplies in our Fabtronic Sewing Set.


Stealth Inventions: Secret Message Box
With lots of folks working and learning from home, it can feel hard to maintain your privacy. Luckily, materials like cardboard, cardstock, empty cans and bottles, and toilet paper tubes (if you’ve been lucky enough to get your hands on some toilet paper) are excellent materials for custom boxes, journals, and other hiding places.
Have a can and some cardstock on hand? Build a box that hides a secret message!
Getting Started
Before your learner does any “making,” consider guiding your learner through the following:
- Can you think of ways secret messages have been used in history? What are some ways messages can be hidden?
- How might you engineer a solution that hides a message “in plain sight”? What ideas do you have?
- How would you go about building a box from the materials you have? Before you get started, try designing a rough template! If you plan on using lights and circuits, as in the example below, make sure you also plan out your circuit.
Making your Box
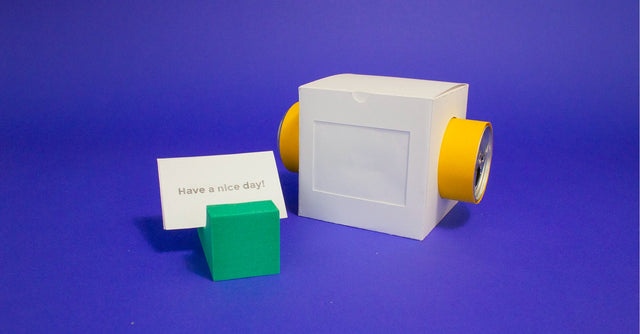
This secret message box uses an LED and light sensor, powered by a coin cell battery, to illuminate the secret message when the can is turned. Want the full project walkthrough? See this project on our website!
This project uses components from our Sparking Sense Set.
Note: For a lower-tech version, consider using a transparent plastic material in the window. Your learner can write her secret message directly onto the plastic. Wrap the can or tube in the middle with a color that matches the marker you’re using, so the message is invisible on top of that color. Then, cover one sliver of the can with white paper — when the can is turned to the right position, the message will appear against the white background! Use dry erase markers for a mini secret message dry erase board!

Want more activities and ideas?
Here are just a few of the amazing resources and content channels available online:
Teknikio Project Central
DiscoverE Engineering Projects
Explora’s “Try this at home”
Joseph’s Machines
0 Comments
There are no comments for this article. Be the first one to leave a message!